|
Toolbars provide one-button shortcuts to common commands. They group similar commands together, so a File toolbar will contain commands related to files and a COGO toolbar will contain COGO commands. All the commands available in a toolbar are also available in that view's menus.
TPC displays appropriate toolbars for each view. Although each view has a different set of toolbars, many toolbars, like the COGO toolbar are included in more than one view.
An alternative to Toolbars is to learn and use the Hot Keys associated with commands.
Navigation Toolbar
TPC's Desktop Navigation Toolbar helps you get to the view you want, when you want it. It's a must learn in TPC.

Toolbar Buttons
Each button (icon) in a toolbar corresponds to a command. The icons are displayed in the pull down menus for each view, making it easier to correlate the command with the corresponding toolbar button.

To display the tool tip for a button, position the mouse cursor over the button and wait. A pop-up tool tip will display the command associated with the button. Move the cursor off of the button and the tool tip disappears.
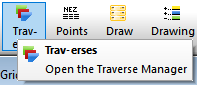
 Pulldown Toolbars
In TPC, some toolbar buttons are pull down toolbars themselves. This is a great way to pack lots of commands into a smaller toolbar and ensures that the command you use the most is always on top.
Turning Toolbars On/Off
To turn tool bars on or off, choose View | Customize View then left-click the Toolbars tab. The Toolbars tab lists each toolbar in the view with a checkbox.
•Check or uncheck any toolbar to turn it on or off.
•To reset the toolbar to its original state, choose Reset Toolbar.

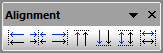
To remove a toolbar from a view you can also undock the toolbar (drag it to the middle of the view) and left click the [X] in the upper-right corner of the toolbar.
Customizing Toolbars
You can customize toolbars, turning existing buttons off and adding new buttons as needed.
Re-Arranging Toolbars
To re-arrange the toolbars in a view drag-n-drop one toolbar at a time. You will need to position the cursor over any part of a toolbar that is not occupied by a button, such as the far left of right side of a horizontal toolbar then drag-n-drop. Hold down the left mouse button as you drag the toolbar to its new location then release the left button. This can take some practice and my require the you re-position a toolbar until you get it right where you want it.
Toolbars can be docked to any edge of TPC's desktop. A toolbar that is currently displayed at the top of the desktop can be moved to the bottom, left or right sides - where ever you want it.
Docking Toolbars
Toolbars can be docked or undocked.
Docked toolbars align themselves at the top, bottom and sides of TPC's desktop. They do not display the name of the toolbar an are limited to one horizontal or vertical row of buttons. To dock a toolbar, drag-n-drop it to the position you want along the edge of TPC's desktop. The toolbar will display it's outline as you do this. When the outline is where you want it, release the left mouse button.
Undocked toolbars 'float' on the screen, display a toolbar title and can display multiple rows. To undock a toolbar, drag-n-drop the toolbar from any edge of TPC's desktop where it is docked onto the desktop and away from any desktop edge. The toolbar will display it's new outline as you drag-n-drop it. Once you have undocked the toolbar, it will display its name above the buttons in a small title bar. You can continue to move the toolbar on the desktop by dragging-n-dropping it to any new location.
To change the number of rows of buttons displayed by an un-docked toolbar, resize the toolbar and reduce it's width. The buttons will rearrange themselves automatically, adding new rows as needed to display all the buttons in the new width.
Using Multiple Monitors
Each view displays its own toolbars. If you expand TPC's desktop across more than one monitor you can move a view to the second monitor and its menu and toolbars move with it.
|

